If you have ever tried taking a photo of a polished gold band or a sleek silver watch, you know the struggle. Instead of looking smooth and luxurious, the metal ends up covered in bright, distracting white spots, or worse—it reflects a distorted image of your camera and the room around you.
High-polished metals act exactly like curved mirrors. To photograph them successfully, you cannot just light the jewelry; you have to light the environment reflecting into the jewelry. Here is how professional photographers eliminate harsh glare and achieve buttery-smooth metal surfaces.
1. The Secret Weapon: Total Diffusion
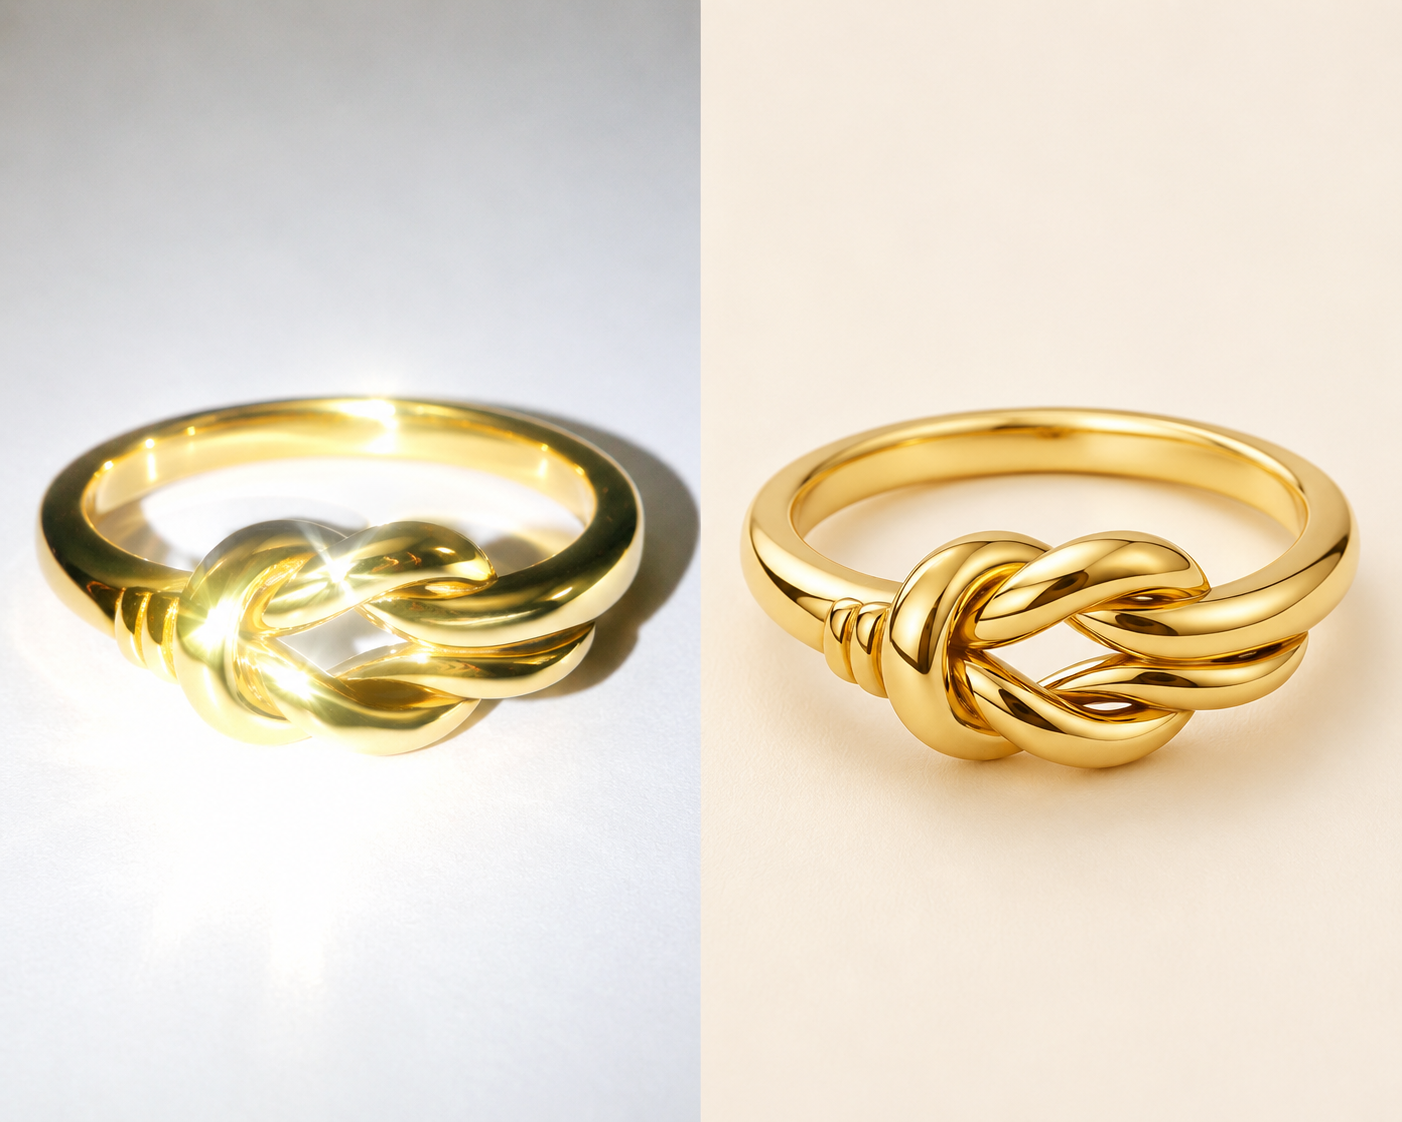
Harsh glare (often called specular highlights) happens when a direct, bare light source hits a reflective surface. To fix this, you need to soften the light by spreading it out. This is known as diffusion.
- Photography Cones: A photography cone (or light cone) is incredibly effective for highly polished pieces. You place the cone over the jewelry and point your camera through the small hole at the top. The translucent material wraps the light 360 degrees around the item, completely eliminating harsh room reflections and direct light bursts.
- Light Tents & Softboxes: If you don't have a cone, a light tent is the next best thing. Position two softboxes on either side of the tent. The white fabric of the tent will act as a massive diffuser, turning a small, hard light into a large, soft glow.
2. Use "Negative Fill" to Add Depth
Once you completely diffuse the light, you might face a new problem: the metal looks flat and lifeless. Without any contrast, polished silver can start to look like gray plastic.
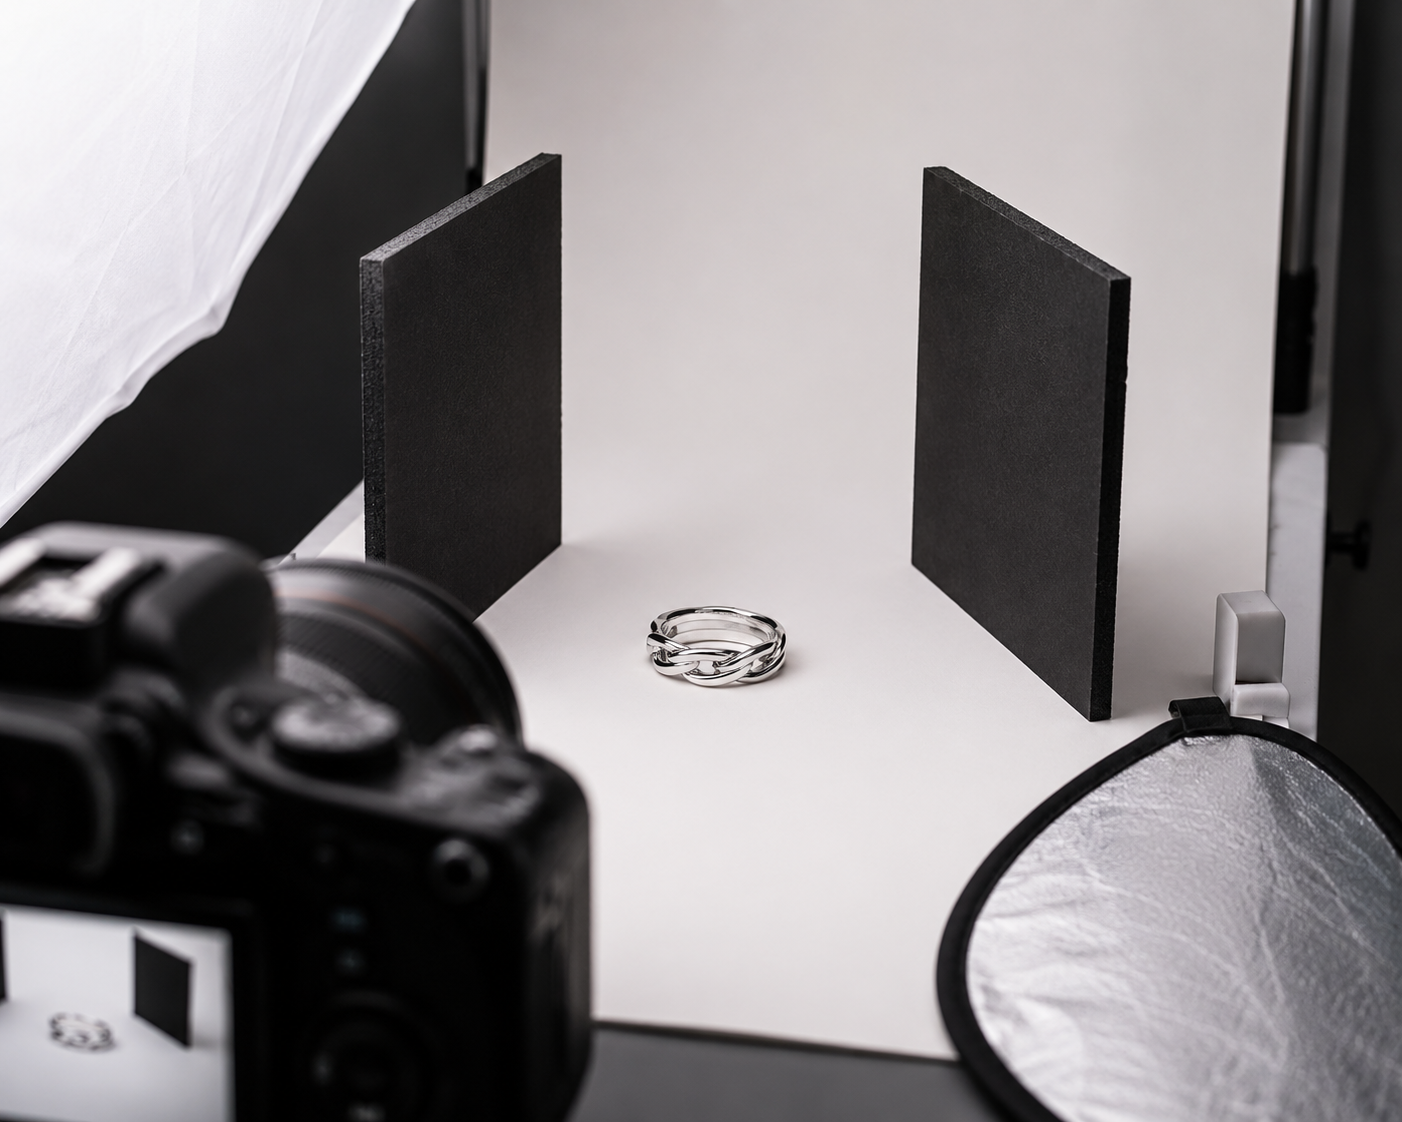
To bring the metallic feel back without introducing glare, you need to use black flags (often called negative fill). Place small pieces of matte black foam board just outside the frame of your shot. The black surface will reflect onto the edges of the metal, creating rich, dark gradients. This contrast between the soft white diffusion and the dark black edges is what makes metal look heavy, polished, and three-dimensional.
3. Master Your Camera Angles
The angle of incidence equals the angle of reflection. In simple terms: if your light is pointing at the jewelry at a 45-degree angle, the glare will bounce off at the exact opposite 45-degree angle.
- Don't shoot from the reflection path: If you see a harsh glare in your camera monitor, simply shifting your camera slightly up, down, left, or right can often move the lens out of the direct path of the reflected light.
- Bounce the light: Instead of pointing your light directly at the jewelry, point it at a white piece of foam board next to the jewelry, letting the soft, bounced light illuminate the metal.
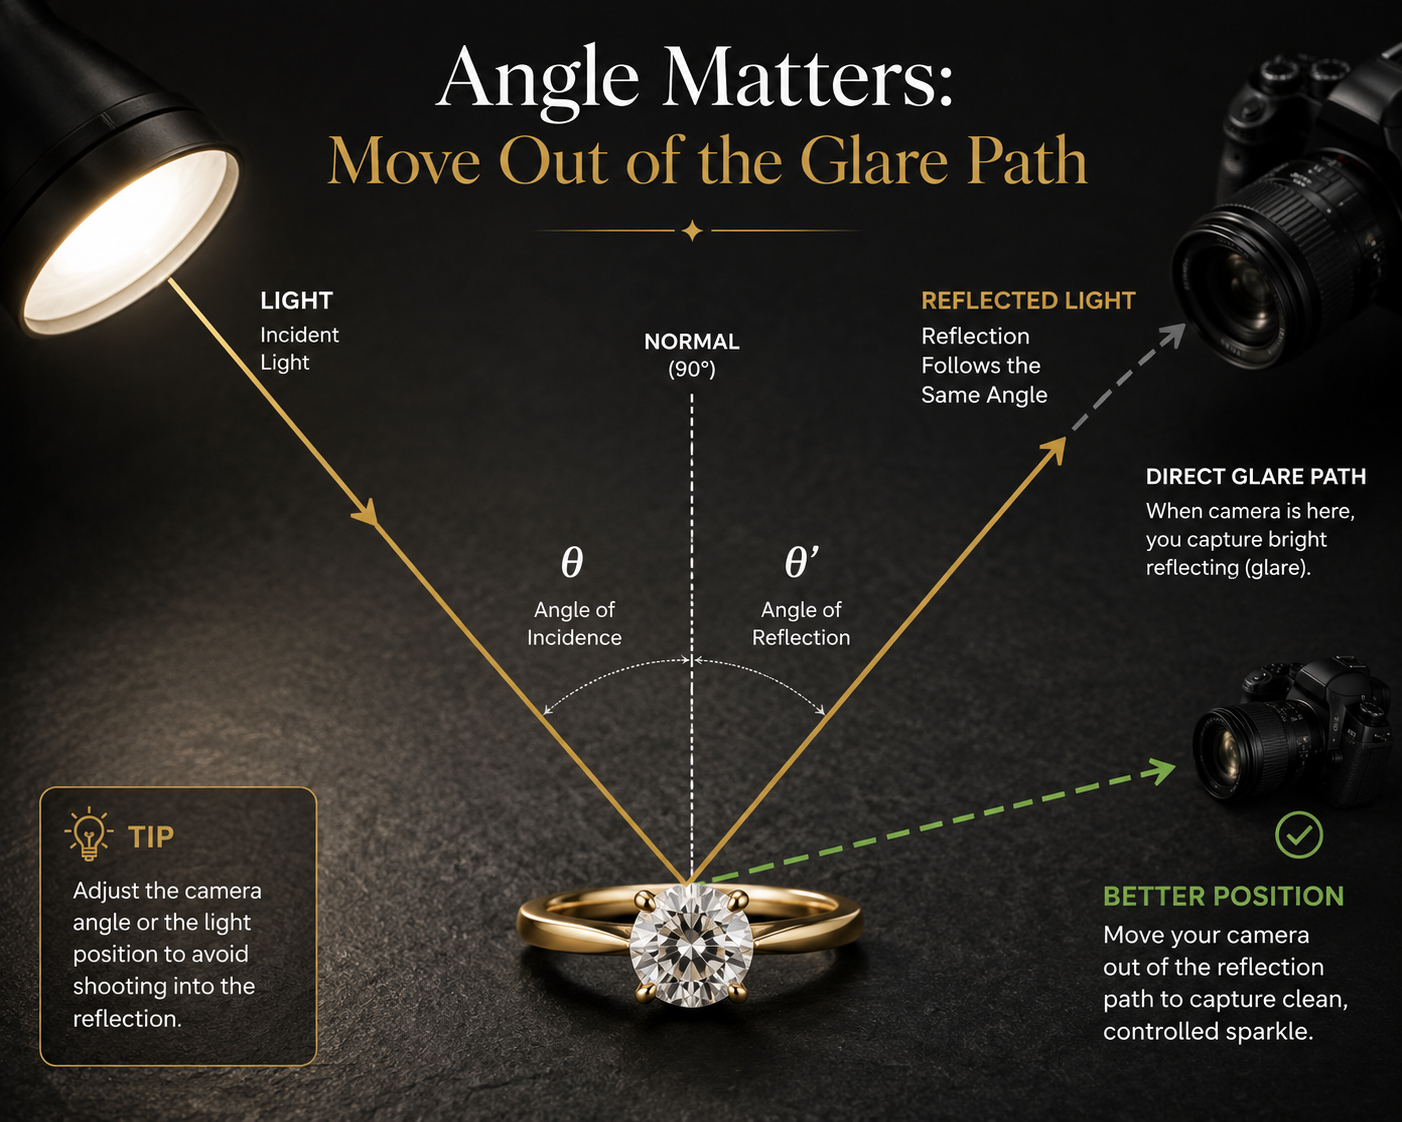
4. Clean Your Jewelry Relentlessly
What looks like a strange, glowing hotspot on camera is often just a greasy fingerprint or a speck of dust catching the light. Polished metal is unforgiving. Before you start shooting, wipe the piece down with a microfiber cloth and wear cotton gloves to position the jewelry on set.
Final Thoughts
Photographing polished metals requires you to think in reverse. You aren't just adjusting lights; you are curating the reflections. By mastering diffusion to soften the light and utilizing black flags to shape the contrast, you can banish harsh glare and showcase your jewelry exactly as it was meant to be seen.
Eliminate Harsh Glare Instantly with AI.
Tired of fighting with light tents, black flags, and stubborn reflections? Grafx is an AI photography platform built specifically for jewelry brands. Generate hyper-realistic, glare-free imagery of high-polished metals in seconds.